
RALPH: Creating an Autonomous Lawn Mower From Scratch - Part 1
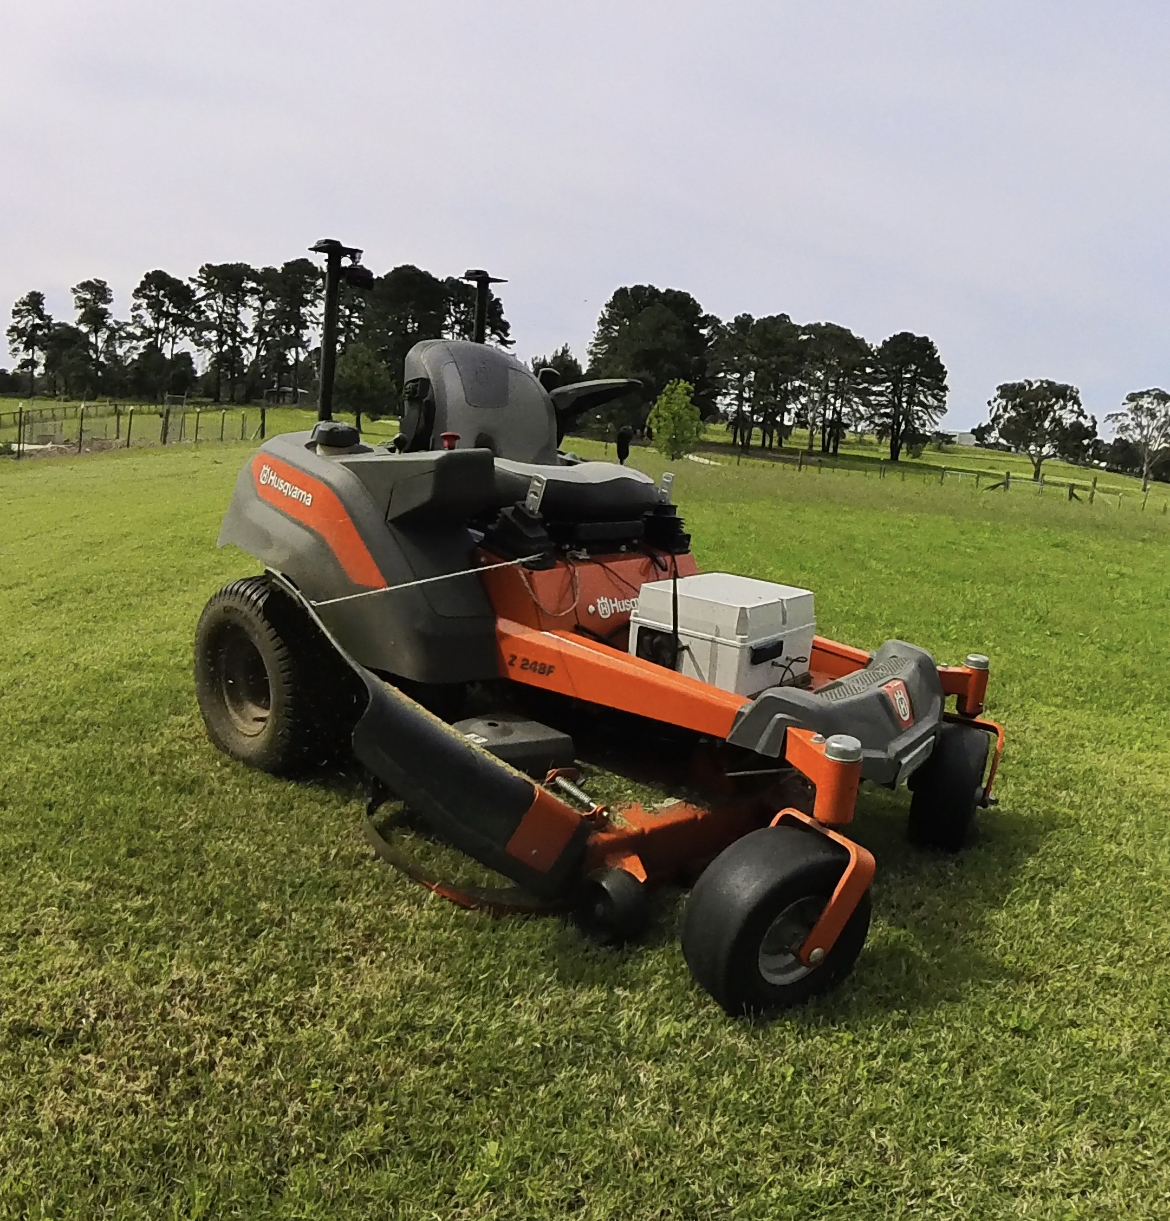
Ever pondered the time-consuming task of mowing your lawn and thought, “How hard can it be” to automate this? That’s precisely the question I found myself asking during a conversation with a neighbor. The answer? RALPH - the Remote Autonomous Learning Platform Host. This fully automated, full-size mower was built using a relatively new Zero Turn Husqvarna mower, a Pixhawk flight controller, and a Raspberry Pi. This is the journey of how RALPH came to be.
This is the first post of a few for RALPH as its a complex project, there will also be an accompanying video on our YouTube channel soon. I’ll provide links to hardware and additional sources of information.
We don’t get paid for promotions or get free products, if we do, we will specifically let you know. Using affiliate links helps to support our work without any cost to you.
The Core Idea
The concept for RALPH originated during a casual chat about the effort that goes into maintaining our lawns which are quite large, more like paddocks. It seemed like a task ripe for a tech solution. After all, in an era where technology has simplified countless aspects of our lives, why should lawn mowing be any different?
Phase 1: Physical Inputs
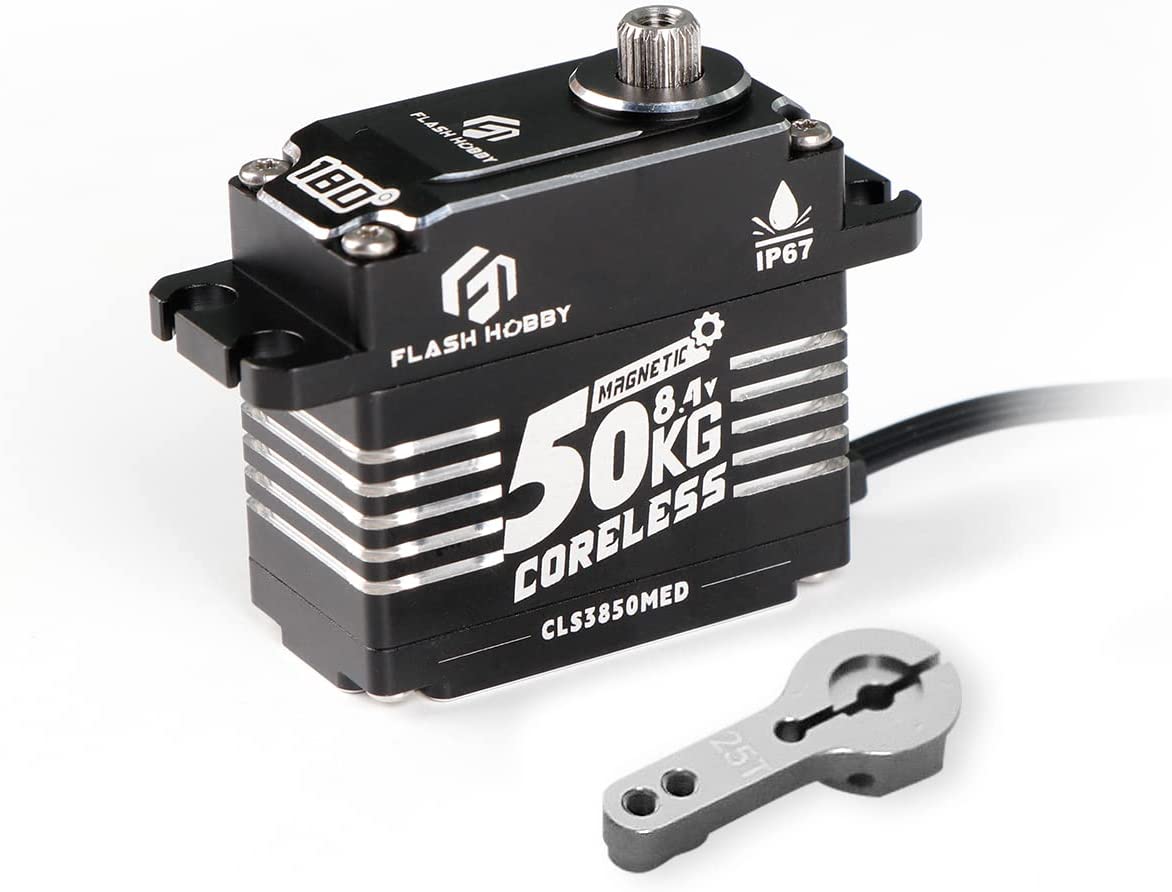
The initial phase involved setting up physical inputs to control and steer the mower. Several different servos and mechanical fixings were tried, tested, and adjusted. The result was a configuration of two 50KG servos with threaded bars and track rod ends. These created the linkages between the servos and the mower hydraulic inputs. Getting these linkages installed ensuring they were rigid, adjustable and strong enough to cope with rapid changes in direction took a few attempts.
NOTE: Make sure you use metal servo arms and use thread lock for the centre screw.
Amazon AU: Savox 50KG Servo
Phase 2: The Brains
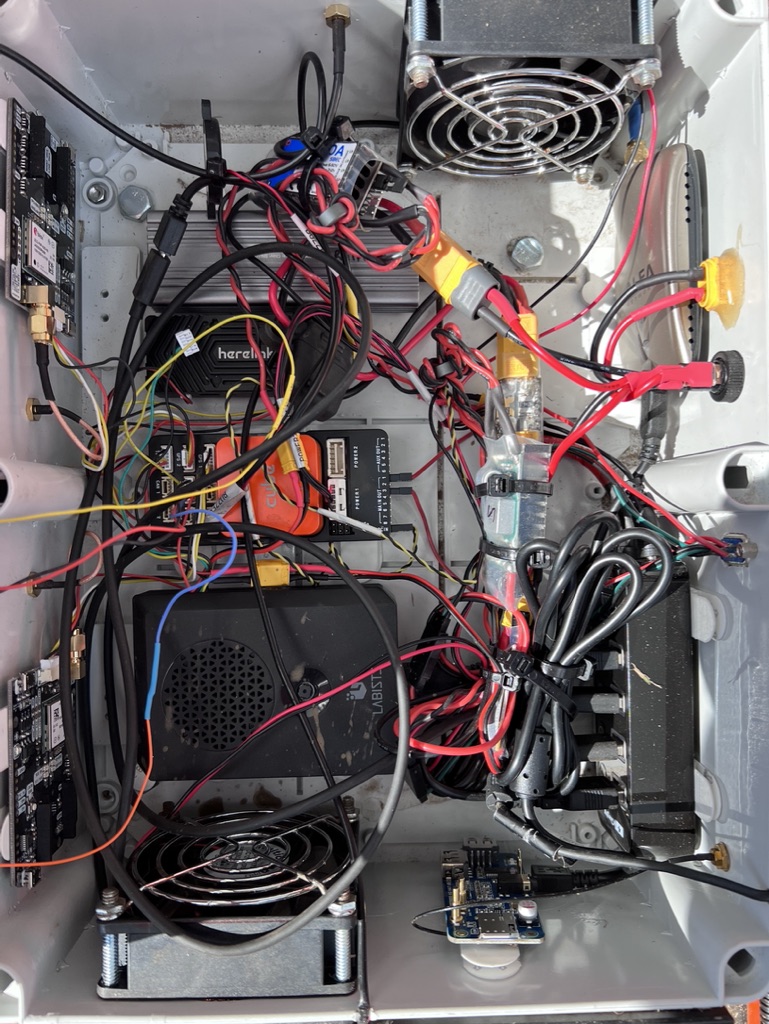
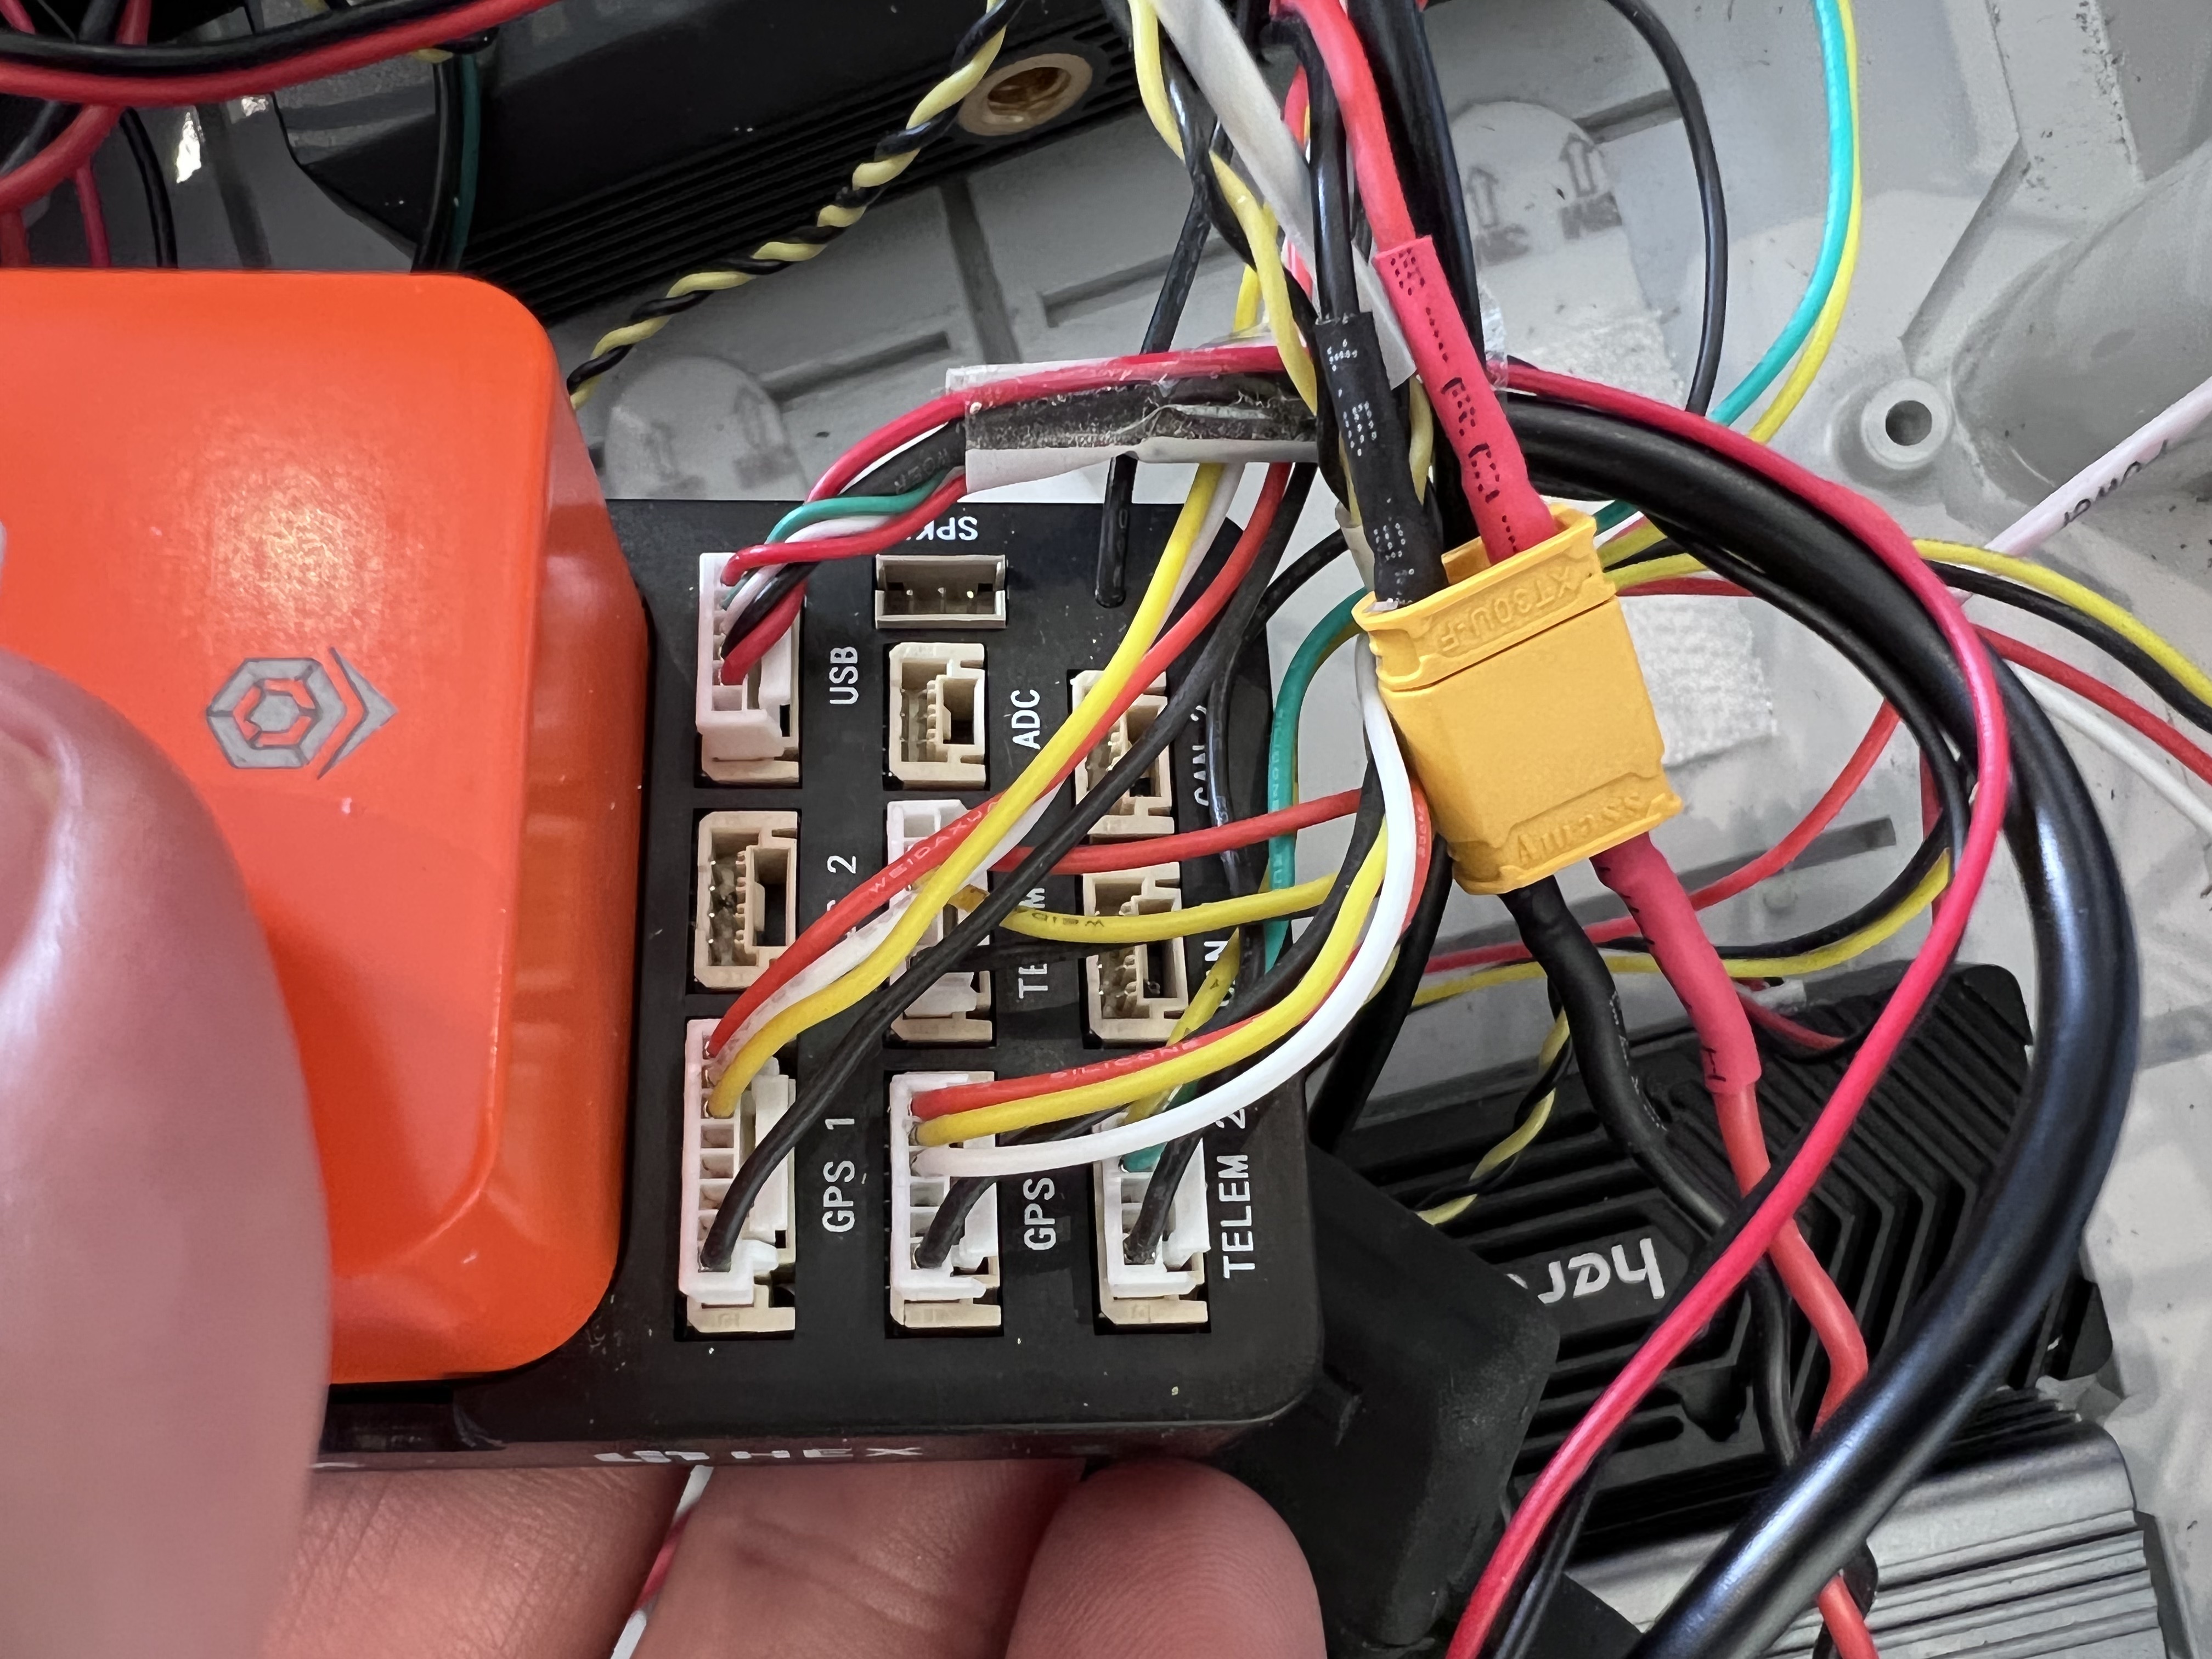
The next phase was setting up the brains of RALPH. The Pixhawk flight controller was used for basic controls, and a Raspberry Pi 4 was connected using the MAVLink protocol. High precision GPS units were connected to the Pixhawk for navigation. Everything was logged via the Raspberry Pi, allowing for continuous tracking and adjustment.
As you can see, it got a little complex and below is a list of each item in the “Brains Box” and a brief description of its function: </p>
1) Pixhawk Orange Cube flight controller
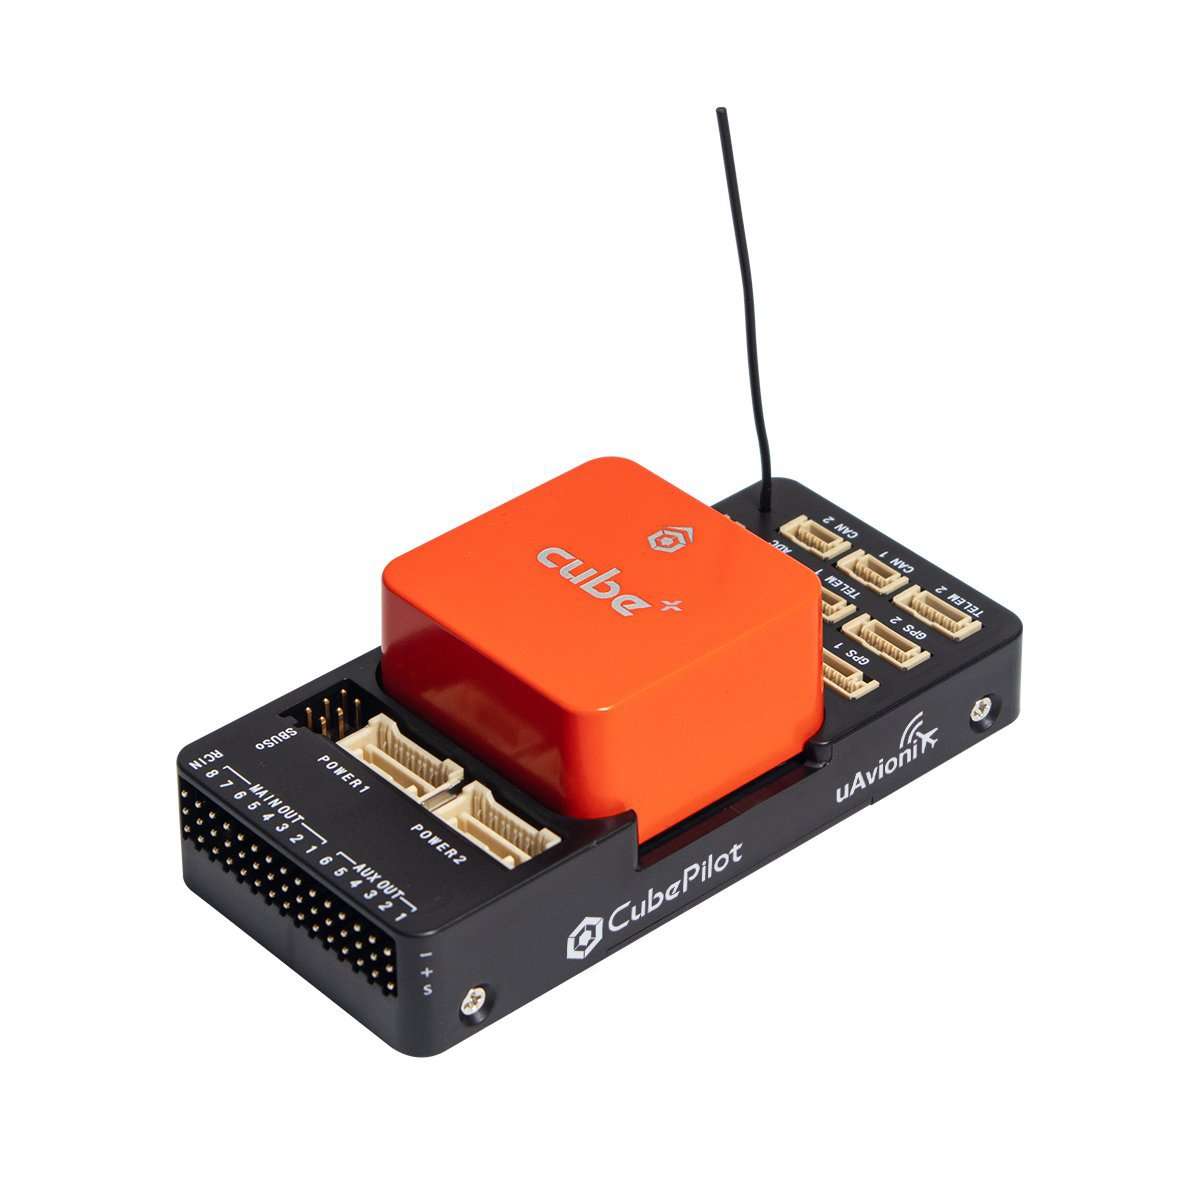
With the Cube Orange autopilot, Cubepilot has hit a home run in the world of unmanned aerial systems (UAS) and Rovers (UAV). This game-changing autopilot module is designed to cater to a wide range of users, from hobbyists to commercial system integrators, and UAV manufacturers.
In terms of specifications, the Cube Orange features a 32bit ARM® STM32H753 Cortex®-M7 processor with a 32bit STM32F103 failsafe co-processor. The sensor package includes three redundant IMUs, two barometers, and a magnetometer, all connected via SPI. Power management is handled by a redundant power supply with automatic failover. On the connectivity front, there are 14x PWM servo outputs, S.Bus servo output, R/C inputs for CPPM, Spektrum / DSM and S.Bus, an Analogue / PWM RSSI input, and 5x general purpose serial ports, 2 with full flow control.
The Cube Orange is an impressive unit and provides way more than we initially need however as RALPH matures, and the experiment continues, we will use more and more of the units sensors and features. Initially we are using the Cube Orange to handle real-time UAV execution, we provide it with everything it needs such as precalculated mapping and routes and then hand over execution to it.
2) Raspberry PI4
 The Raspberry PI 4 needs no introduction and if you dont know what it is already, this probably not the project for you. This is used as a server within the build and connects to the Cube Orange via the MAVlink protocol. I managed to build a Raspian image with ROS as I plan to move functions from the Ardupilot to ROS over time and I’ll explain why later in the post. I used an 8GB PI, again because I’d rather have too much than too little.
Amazon AU: Raspberry Pi 4 Model B 8GB
3) M.2 NVMe and Enclosure
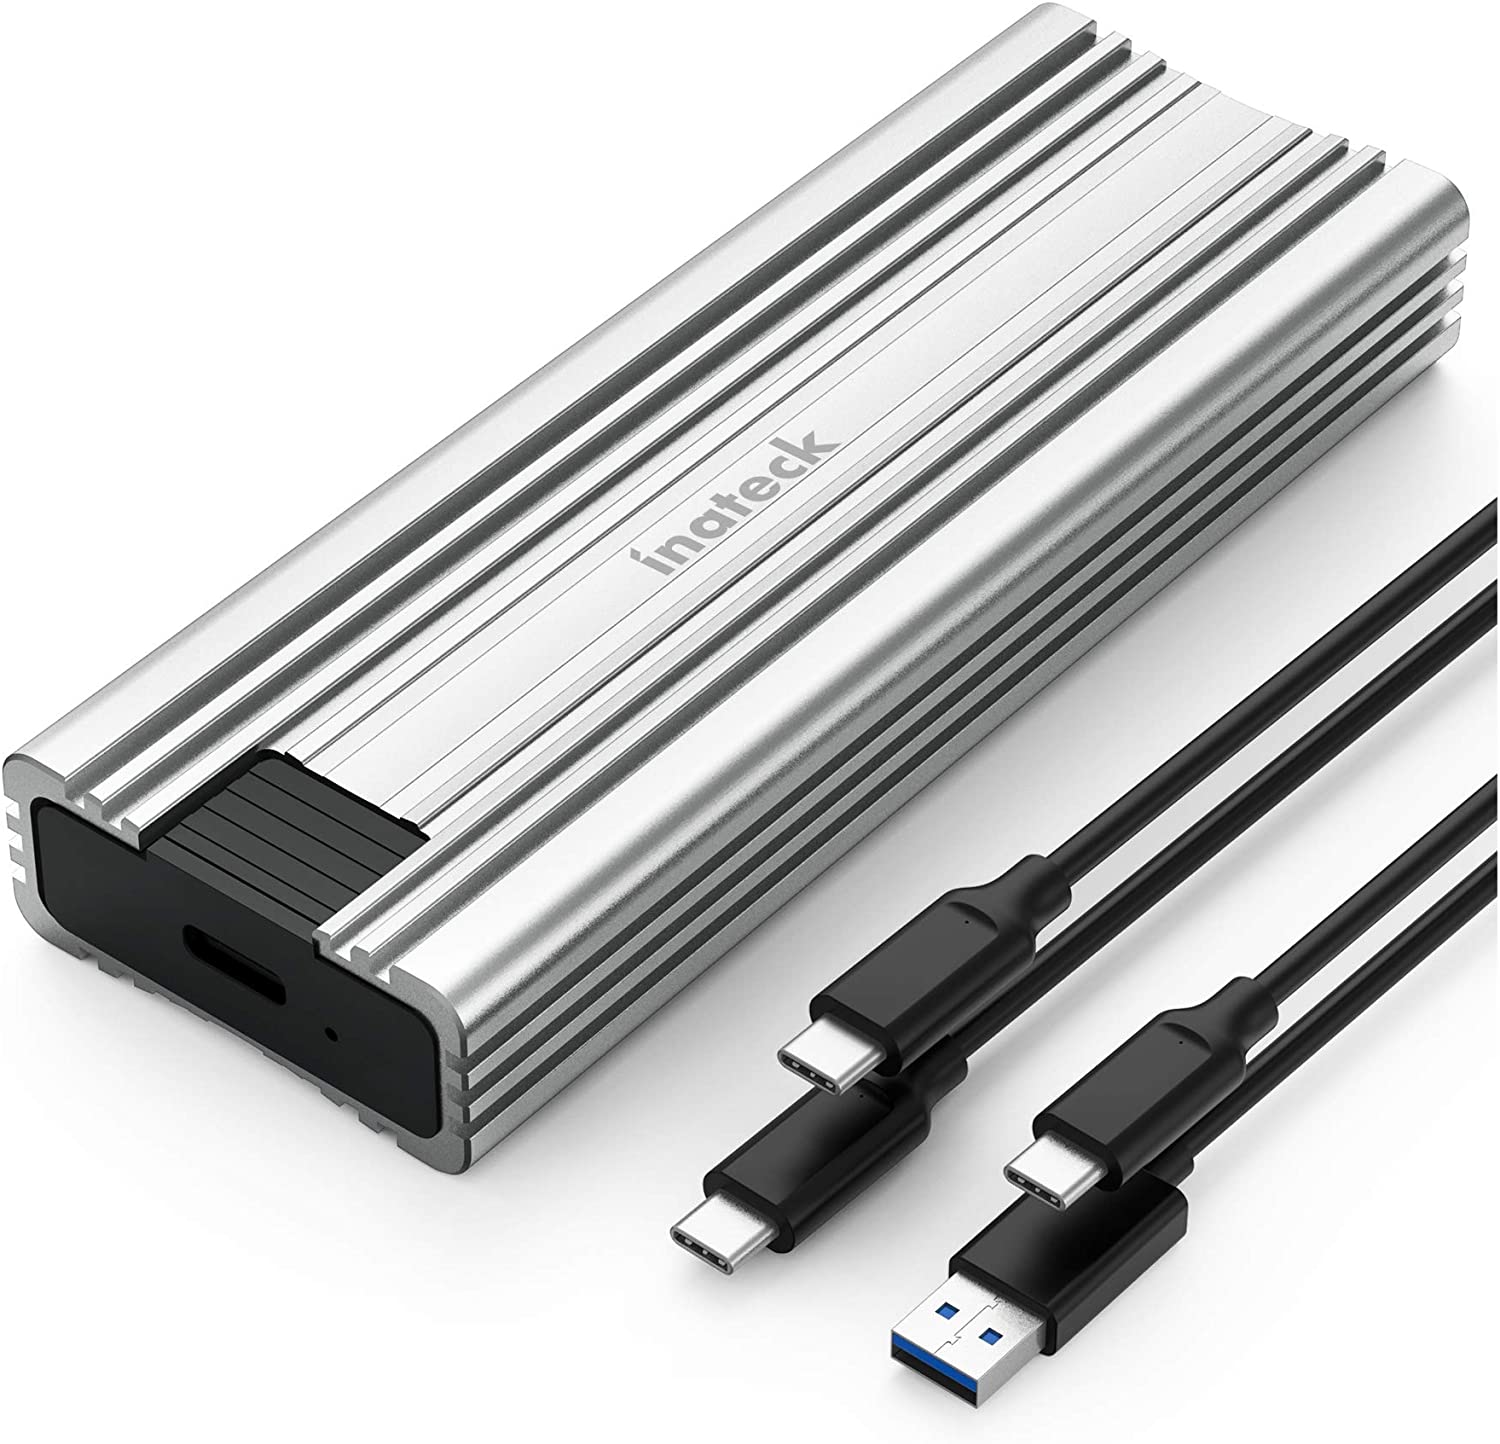 Logging was expected to be significant and Raspberry’s can be unreliable using SD Cards and so I decided to use NVMe connected via USB. I used 500GB M.2 but you might not need this much room, i’d rather have too much then too little. The case provides good heat dissipation and protects SSD in the harsh environment. Booting from the NVMe makes the Raspberry super reliable, we have used the mower nearly 50 times already and not followed any specific startup or shutdown procedures other than to power on and power off. Its never missed a beat.
Amazon AU: Inateck M.2 NVMe Enclosure
Amazon AU: Samsung 500GB NVMe M.2 SSD
4) 4G Modem
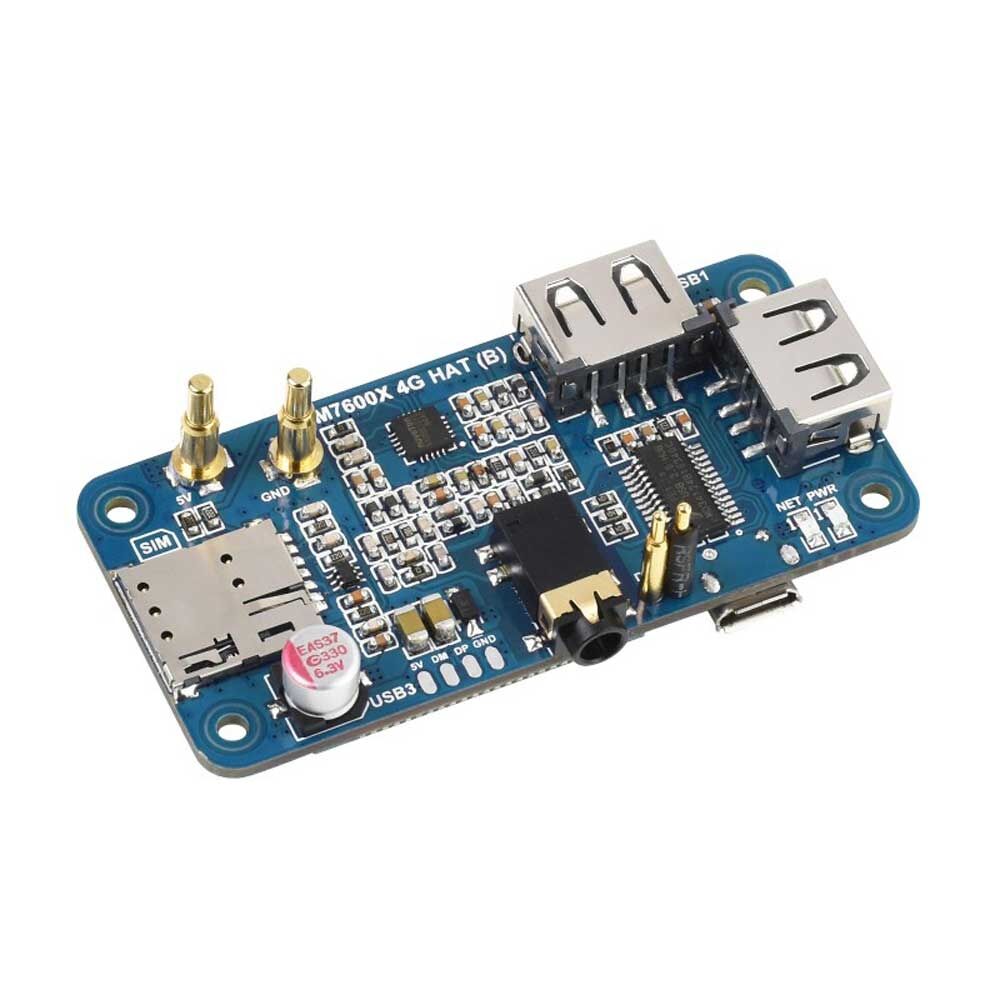
This modem is actually a hat designed for a Raspberry Zero however it also has USB connectivity and so its small form factor makes it ideal for our purpose.
It’s used to enable constant communications for PC control, logging and RTK feeds.
Core Electronics: SIM7600G-H 4G HAT (B)
5) Powered USB Expansion
Theres quite a lot of peripherals attached to the Raspberry PI and I found that it wasn’s able to provide enough power to all of the devices. I used this Powered USB Expansion to add more USB ports used a PCM to provide power from 12v down to 5V.
Amazon AU: Tendak USB Hub
6) Alpha USB Wifi
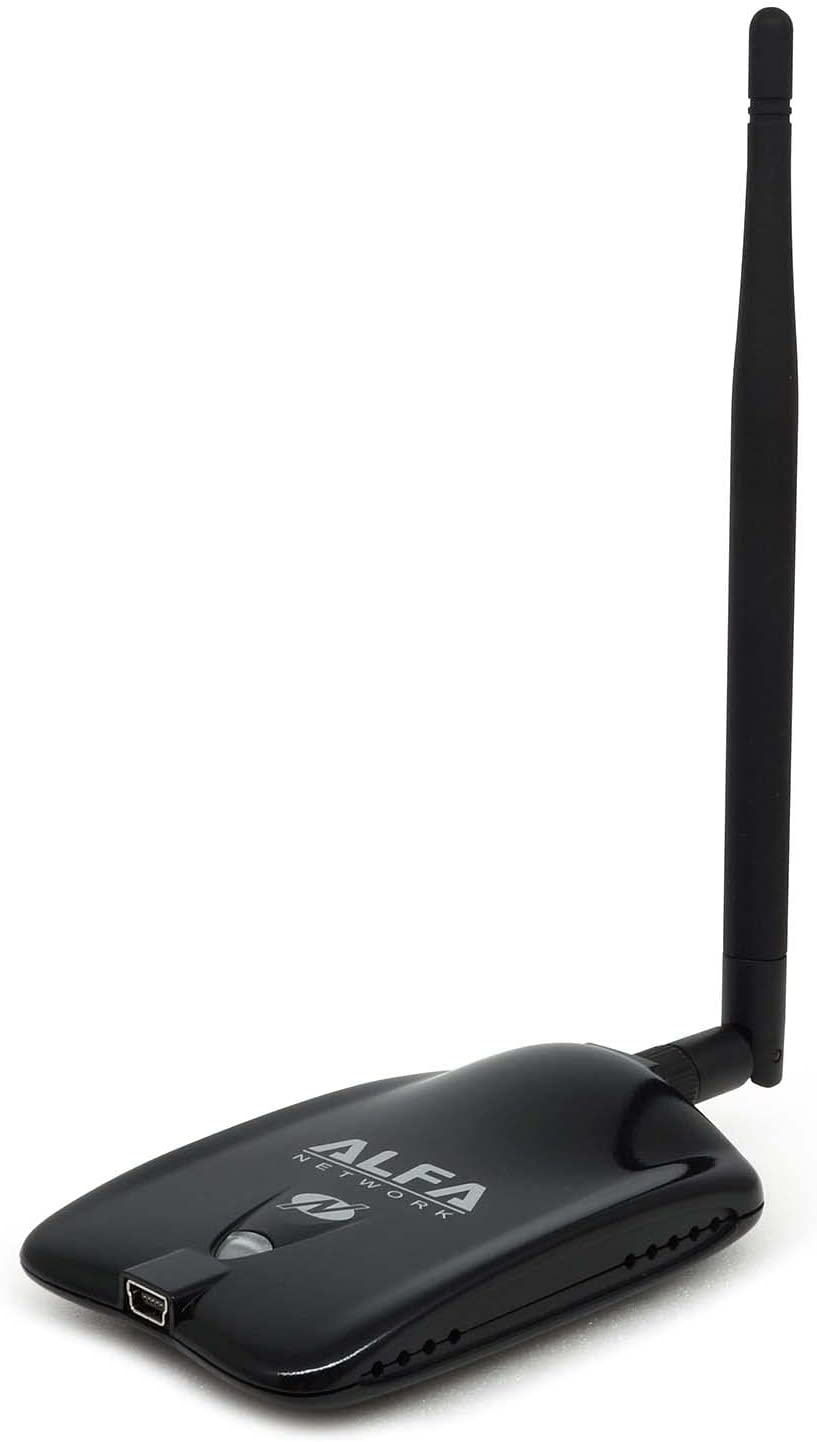 We have good Wifi coverage at home, as well as outside and so I wanted to be able to use Wifi rather than 4G whilst testing and so added this long range Wifi adapter that worked quite well. Another advantage is that the antenna is detachable and so, when extended using and SMA pigtail, the antenna can be attached externally to RALPH’s housing.
Amazon AU: Alfa Wireless B/G/N USB Adaptor
7) Ardusimple RTK GPS
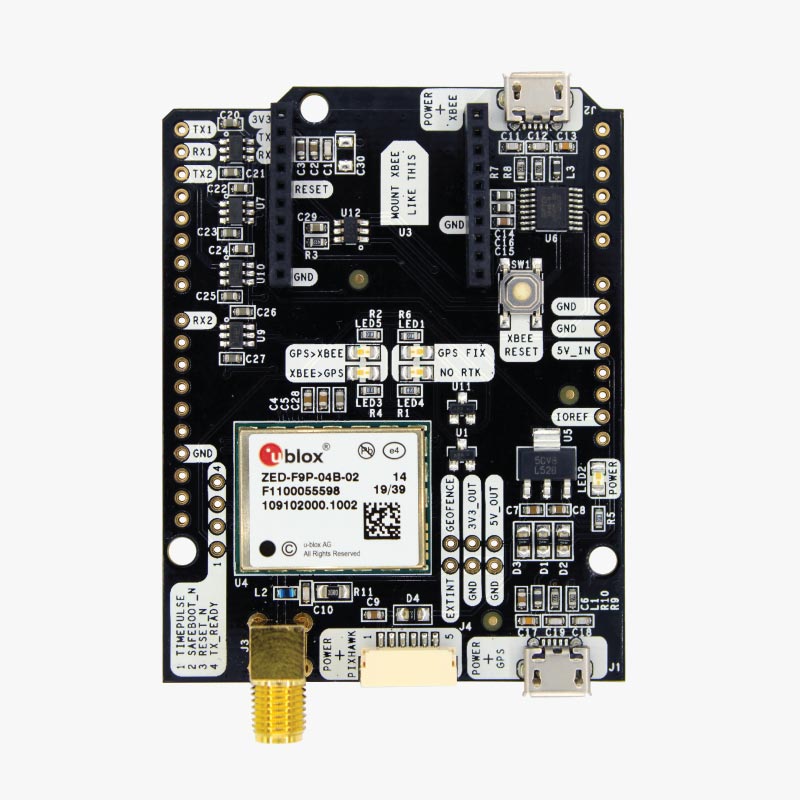 One of the key requirements is high precision GPS which is a whole topic in its self. I ended up with two Ardusimple simpleRTK2B. Two were used to enable high precision direction finding as compasses can be unreliable, or at least not accurate enough in real-time given that RALPH’s frame is made from metal. The enable reliable high precision its necessary to get an RTK feed from a local base station. I found a publicly available feed local to where we live and so the modem is used to receive this feed.
Ardusimple: simpleRTK2B GPS + Antenna
Phase 3: Mapping and Programming
The final phase was mapping and programming, which was taken care of by the ArduRover software. I programmed some waypoint buttons into the remote control unit, then guided RALPH around the area manually, capturing waypoints as it went. This data was uploaded to ArduRover, and using software features, the mowing tracks were defined and re-uploaded to the Cube Orange.
The Process: Implement, Test, Learn, Repeat
The development of RALPH was a cyclic process of implementing, testing, learning, and repeating. After each implementation of a new feature or function, extensive testing was carried out to identify any issues. These were then addressed in the next round of implementation, following a continuous improvement model.
Challenges and Triumphs
As with any tech project, there were challenges along the way. But every hurdle was an opportunity to learn and innovate. The final result? A fully functional, automated mower that can take care of your lawn while you enjoy your free time.
Conclusion

So, how hard can it be to automate your lawn mowing? With some tech know-how, the right tools, and a bit of perseverance, pretty hard actually. But the satisfaction of seeing RALPH glide around the yard, doing the work for you? Absolutely priceless.
There is a bunch more todo with RALPH:
- Collision avoidance. We have experimented with LIDAR however its too sensitive and gets confused by dust and flying grass clippings in the wind.
- Next we will try using some car reversing sensors and will feature this, and more detail in our next post.
- Experiment with moving from Orange Cube to ROS for mission execution. I find that Ardurover has heaps of super complex options and it might be easier in the long run to create me own ROS code. I’d also like to create a mobile phone app to control the mower which might be easier using Flutter and ROS2.
Stay tuned for more tech adventures, where we’ll continue to ask, “How hard can it be?” After all, with technology and a sprinkle of imagination, the possibilities are truly endless.
We don’t get paid for promotions or get free products, if we do, we will specifically let you know. Using affiliate links helps to support our work without any cost to you.